
I will be looking at drawing the simplest pioneering structure, the tripod.In the next few drawings I will be introducing you to most of the basic tools in SketchUp, and some of the most important concepts (click on any of the pictures to see a full-screen view of it).

 Open Sketchup and look in your toolbars for the circle tool. Click on it, then move your mouse over the white area in the middle of the page. Your circle should turn blue- this means that it is going to draw flat on the floor (Sketchup uses 3 colours- red, blue, and green, to represent different directions. Blue is flat, green is vertical north-south, and red is vertical east-west. This way, anytime a line turns a certain colour, you know it is lined up with that direction). Click a point to select the centre of your circle, then move the mouse and watch how the circle gets bigger and smaller. Down in the bottom right hand corner of the page is a little box with a number in it that changes as you move- this box is called the Value Control Box, and at the moment is showing the radius of the circle. We want the radius to be 100mm (4 inches if you are working in Imperial measurements) so you can either move the mouse until this value reads properly, or you can do this:just click anywhere to make a circle of any size, then type in '100mm'and hit enter. The circle will resize to the number you typed. This works for almost every command in SketchUp that takes a number as an input. This only works when it is the VERY NEXT THING you do after placing an object.
 One of the cleverest thigns about SketchUp is how you navigate in 3d space. If you are using a mouse with a scrollwheel, roll the wheel up and down. This ZOOMS in and out. Now hold the mouse wheel down and drag the mouse. This ORBITS or moves your eye around the model. Now hold SHIFT + the middle mouse button and drag- this PANS the page around. Move around like this a bit to get comfortable. IF YOU WANT TO GET THE MOST OUT OF SKETCHUP, YOU NEED TO ORBIT,ZOOM AND PAN CONTINUOUSLY. As you are drawing, these tools are available- you can always zoom in and out, orbit and pan- even while you have placed a circle and are still sizing it. Next, let's turn our flat circle in to a 3 dimensional drawing:
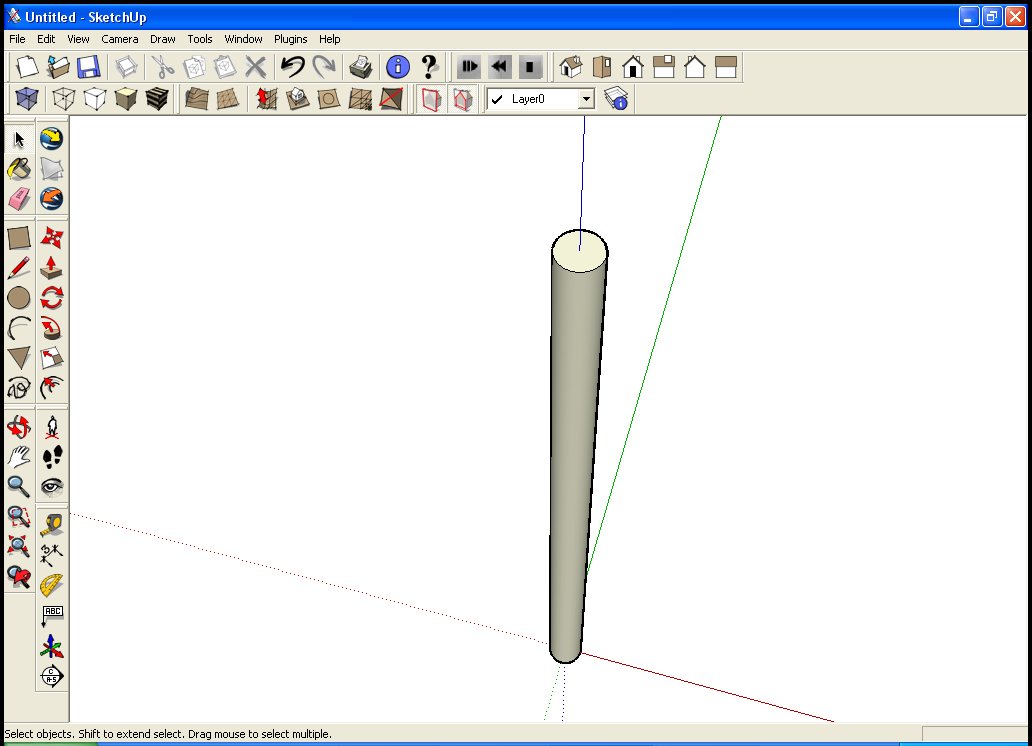
 Look for the tool that has a box with an arrow pointing up. This is the push-pull tool, and you will spend a LOT of time in SketchUp using this tool. Click on the tool, then click on your circle, release, and move the mouse. Watch how the flat circle is turned into a pole ( I hope that answers your question, Meydad). I want a 2m long pole, so I will just click the mouse to end the pole, and type in '2000mm' to set the height.
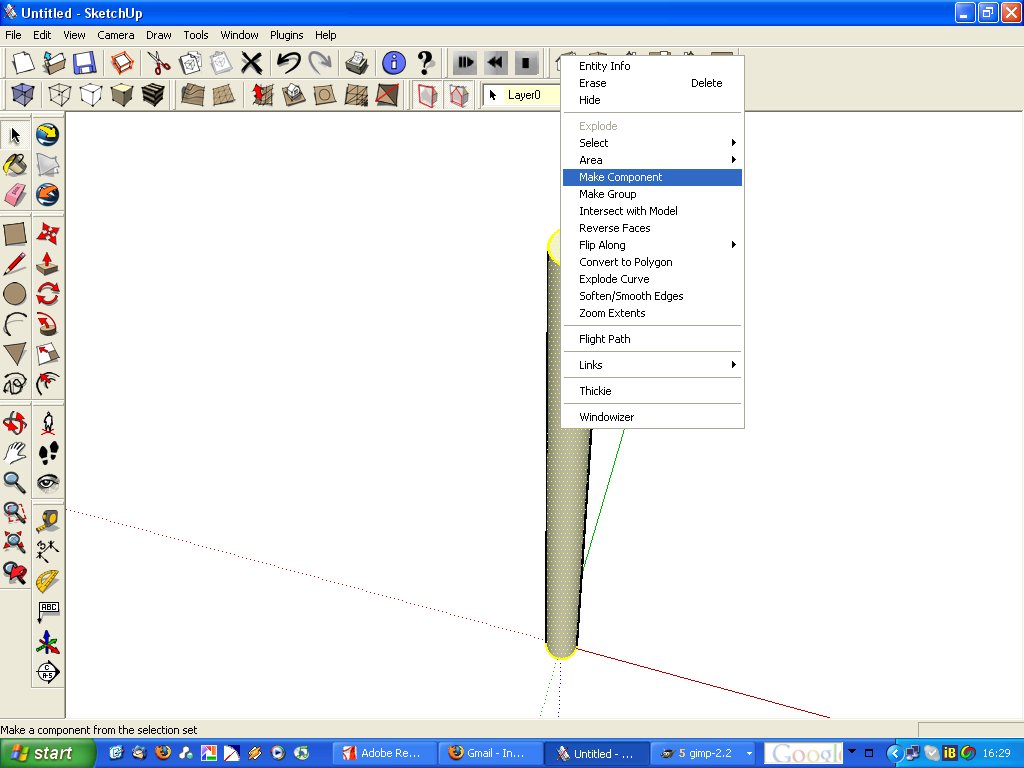
A very important discipline to learn in SketchUp is to group everything together. At the moment, if you click on your pole, you will see that the part you click on is highlighted- click the circle on top, it highlights. Click on the black edge, and it highlights (by turning yellow). We want to be able to easily select the WHOLE object and move it around. So a few tips: Double-clicking any entity (a line or a face) will select that entity and the edges or faces around it (double click on the middle of the circle on top of the pole and you will see the line around the edge selects as well); Triple clicking selects all of the entities connected to it. Triple-click to select the whole pole (top,bottom and the line around them) then right-click. We are going to look for an option called 'make component'and click on it.
 A component is one way of joining entities together to make it easier to work with them. Give your component a name, and make sure that 'replace selection with component' at the bottom is selected. Components are very similar to another collection of entities in Sketchup called a group. This is the difference: every component in a drawing is EXACTLY the same as every other component with the same name. So if you make the pole a component, then make a few copies of it (I'll show you now how to do that...), when you go and change the length of one pole, all of the others will change. You would use groups if you don't want that to happen (there are other ways around it, but for today, that's a good enough explanation). So, make a component from the pole, and remember that components are all copies of each other, and changing one will change all of them.
 The move tool is next. This tool is a bit sneaky, because it is actually move, copy and rotate all rolled into one tool. Click on an object and move the mouse to move it- notice how SketchUp tries to keep you in the red,green or blue directions- this helps you keep your drawing accurate. New hit escape and try holding down 'ctrl'and clicking on an object (I think that's option-click on a Mac). You should see your cursor adds a small + to it- this means you are in 'copy' mode. The final thing this tool does is rotate. That's what we'll use it for right now- select the move tool, and move the cursor over the pole. You'll see a yellow box around it, and 4 red + marks. When you move the cursor over one of these, a protractor (circle with angles marked on it) pops up on that box face. Click and drag to rotate the pole.
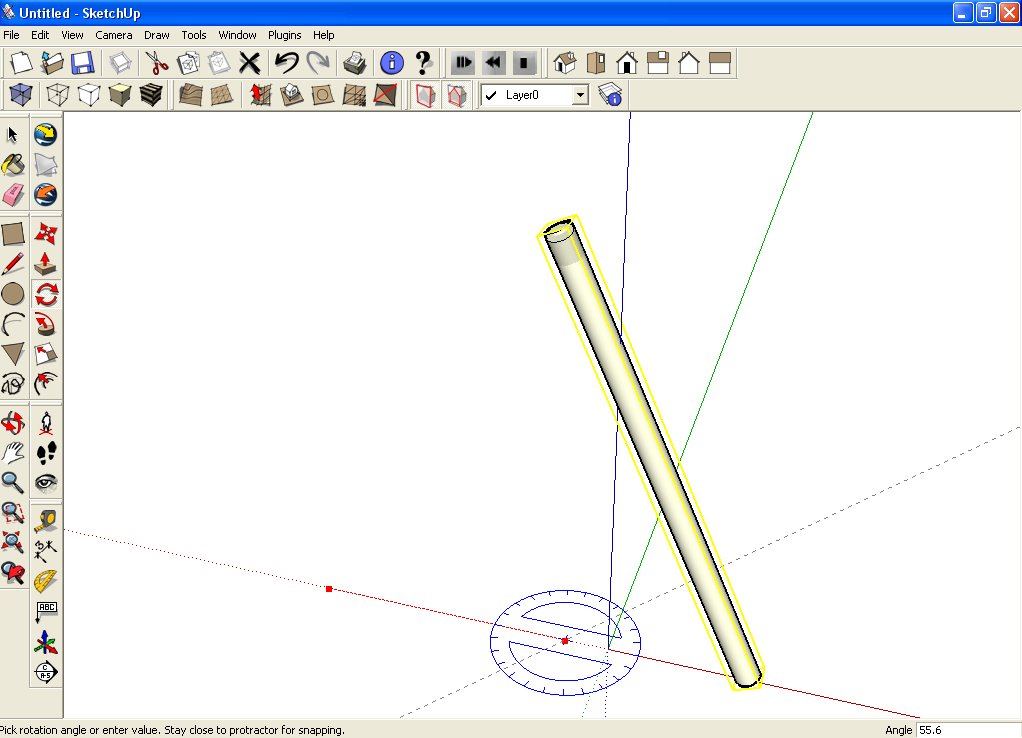

We are nearly done- you should have a tripod of some kind- but maybe like mine the poles pass through each other, or maybe they miss altogether. This is not good pioneering :), so we will try to fix that.

Double-click on one of the poles- notice how the other poles have faded away a bit and the box around the pole is dotted. You are now working 'inside the component', you can always enter any component any time in Sketchup to do this. Still working inside the component, triple-click it to select all the parts, and select the move tool. Now as you move the pole around, notice that the other 2 poles move as well- because they are all copies of the same component.
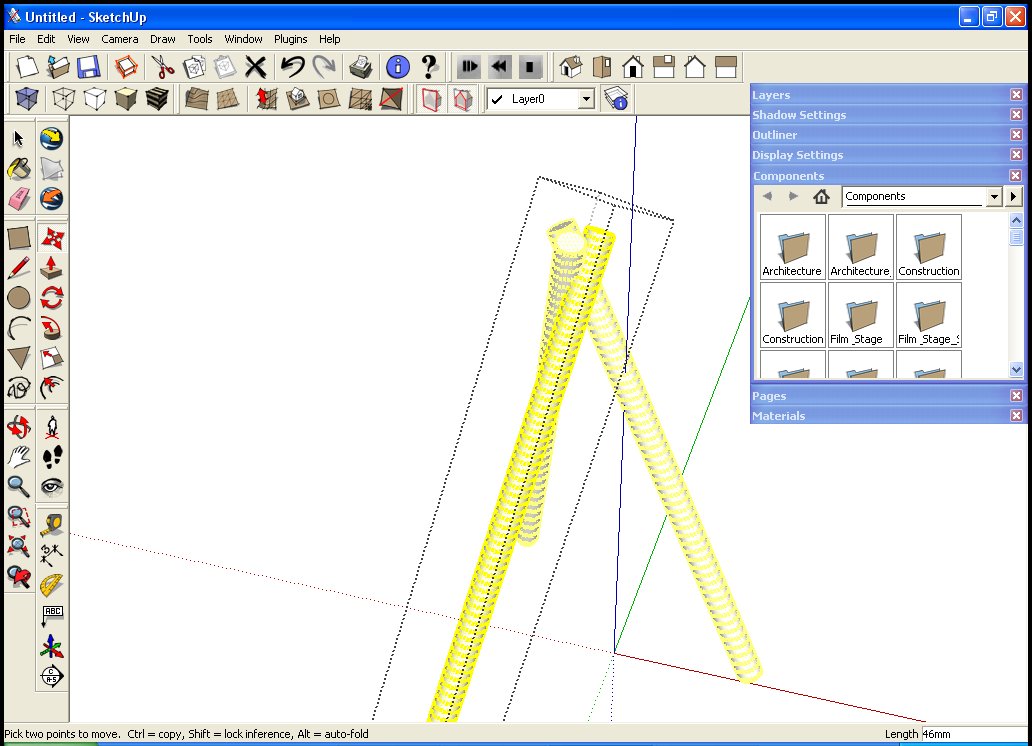
Move the pole until the three are just touching, then hit escape to close the component.
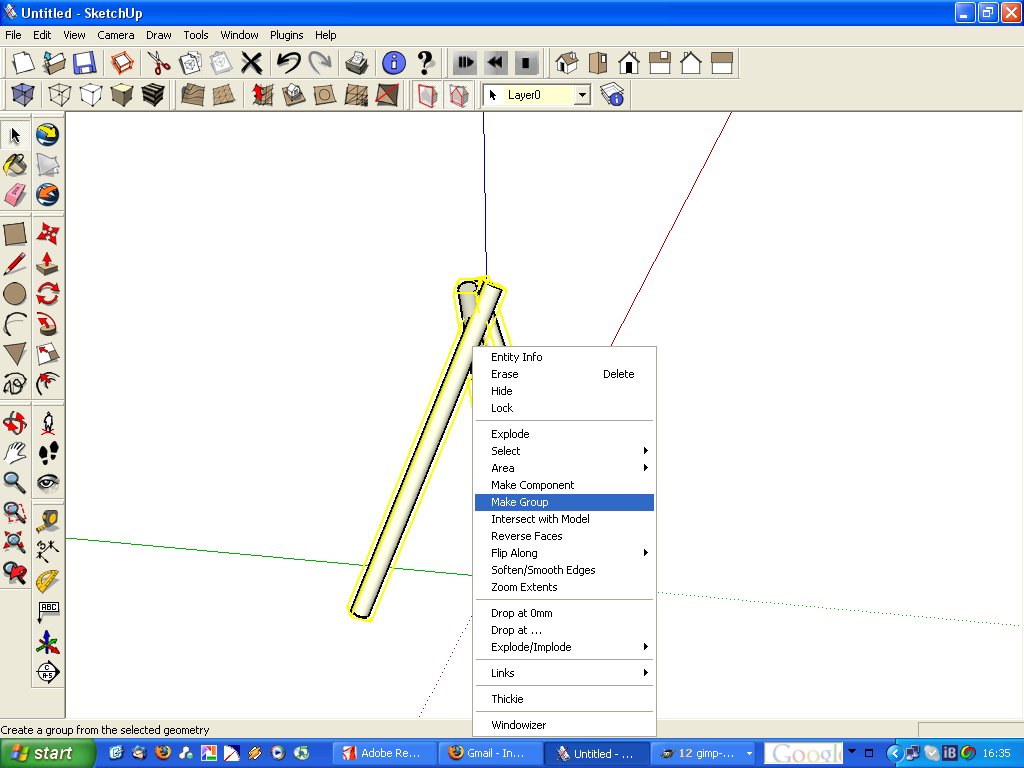
Almost done- the last thing to do is to select all the poles- click the select tool ( the cursor arrow) and draw a window around them. Make sure all three are selected, then right-click and choose 'Make Group'.
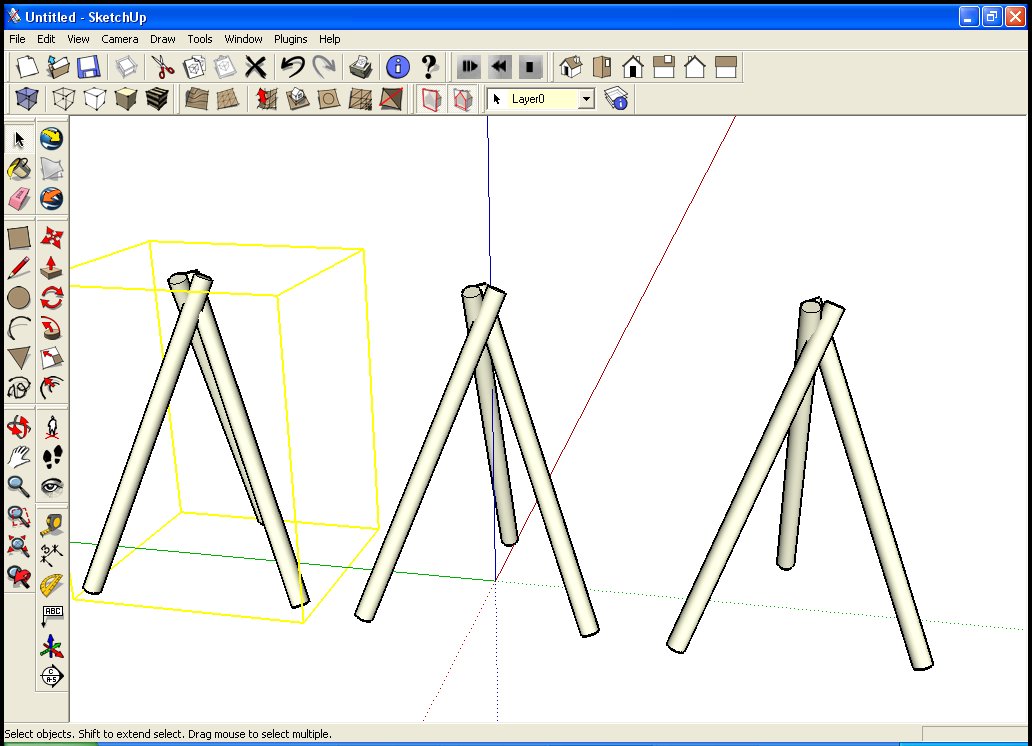
Now that you have made a group, you can select it and copy it (by using ctrl-move) to line 3 tripods up like this.
And that's your first SketchUp model done! Plus you know tools that you will be using over half the time you are working in SketchUp.
There are a few resources you can look at for more help:
-Print out the quick reference card (for PC or Mac) and keep it next to your computer all the time.
-Watch the video tutorials if you have broadband- this is the BEST way to learn SketchUp.
-Check out the self-paced tutorials that come with SketchUp.
-SketchUcation is a website with more advanced tutorials, a good place to learn some nice tricks, especially if you want to be able to work QUICKLY in SketchUp.
-Finally, join up at the SketchUp official forums and ask for help there- people are VERY helpful and you will have an answer to just about any SketchUp related question in a few minutes. One tip- please do a search on the forum to see if your question has already been answered.
No comments:
Post a Comment